Quilt with Me: Sew those Rows into a Quilt

Hello there Quilt-Alongers! I have a tutorial for you, whew! Because I will confess I'm only days ahead of myself when I push that publish button! :) But that's okay because this quilt top is coming right along. I do love to see a quilt come together!


Oh and since I last shared with you I was told about the Pantone Challenge hosted by Adrianne from On the Windy Side and Anne from the Play-Crafts blog. The colors I am using are perfect, are you doing purple too? Well then let's join in!
2014 Pantone Quilt Challenge: Radiant Orchid

All right so now let's get back to the quilt along! By now the blocks, side units and top and bottom units are sewn together and you've been playing around with the  layout on your design wall, dinning room table, open floor space. Great! Let me show you how to sew up a diagonal set quilt because it really couldn't be easier!

First step is to get that layout just how you want it. Start with the main center blocks. The quilt goes three blocks across, then two blocks, then three, then two, then three, then two, then three. On point there are 4 blocks down.


 Once those are laid out start adding in the side/top/btm units to get a nice variety of patterns and colors.


Next you'll add the solid corner triangles that are cut from 2-8" squares. Add those only to the ends of the top/btm rows. You will add them to the top/btm side units once the rows are sewn together (see photo below). 


With all the blocks laid out how you want them it's time to sew the blocks and units together into rows. Begin by matching up the seams in the middle and pin out from there to the edges on each block. There will be six rows all together. Once the six rows are sewn then sew the rows to each other. 

Join rows to each other by again matching up seams first and then pinning to the edges. On the blocks and the rows the edges of the side and top/btm units will be a little overhang from the triangle (like a dog ear) and this is good, you'll want that to create a seam allowance. That is why you pin from the seam and work out to the edges so that bit will hang off. 


Here is the first row all sewn up and read to attach the corner triangle to finish off the edge.


Work slowly and carefully matching up all the seams and pinning a whole lot especially when sewing all the rows together. The bias edges are very forgiving when stretching seams to match them up but they are also be very fidgety so pin well! A tip for working with the bias is to starch the heck outta them to make them stiff and flat!


Waaa-laaa! A quilt top all sewn up! Hooray! Hooray! So if you've got a question or need clarification on any step of sewing the blocks and row or corners let me know! I'll be back next week to talk quilting, but first I have to stare at this little gal and see what way she wants to be quilted! 

And share with me what you're making! Flickr here IG: #bluebirdsewsQAL

Cheers!

Kelly 

week 1 here: fabric choices/values
week 2 here: cutting instructions

QAL with Blue Bird Sews

Quilt with Me: Cutting Squares for Diagonal Settings


Hello again and welcome to the second week of Quilting with Me where we talk about cutting and constructing all the half squares triangles (HST). And let me tell you, my brain kinda hurts because of it. When I make quilts it is from scratch in my head with a few roughs sketches and measurements. And most the time they are not on point.

Toying around with settings has been on my quilty want to list for a bit. A block can change so much when you flip it 45°; a little magic happens in that spin. Turns out magic takes some math but luckily there are a whole lot of resources out there to help a quilter navigate the numbers.

I learned about side setting triangles and what math to do for them. These are the triangles that fill in around blocks when set on point. I will not attempt to explain or say I fully understand it. I just plugged in some measurements, tried out a block, asked my mates at PMQG what I was doing wrong, then I went back to the sewing machine, made a tweak and Bam. Side setting triangles figured out, kinda. I wrote some stuff down and it works, how it works? Magic.


I learned a couple of really great techniques for HST making and trimming from the on-line quilt community. It has changed my world! The first is making HST four at a time and I used a tutorial from Christina Lane, The Sometimes Crafter, posted as a guest topic at Whipup. The method she describes is so simple and elegant, yielding 4 HST from two squares sewn together.

The second little trick I found is by Amy Smart, Diary of a Quilter. She stumbled upon the way to use an HST ruler from Quilt in a Day; which I happened to have already! With the ruler you can trim HST before opening them up for pressing and having to only cut once to trim! Yay! Check out both of these great techniques then come on back for fabric measurements and all the mathy goodness you can handle!

These are the measurements for a quilt that finishes just a bit bigger than crib size (36"x54"). The above method of making HST is what yields these measurements. If you're using another method then find finished HST size and amounts below. (unfinished measurements)

Inner 4-patch Blocks
8.5" squares : CUT 36 from various prints low/med/dark purple/grey/cream
Total: 5.5" : 72 HST

Side Setting Triangles
9" squares : CUT 6 from various prints
Total: 5.5" : 6 HST
Total: 5.875": 6 HST ---> 12 Quarter Square Triangle (QST)

Top and Bottom Setting Triangles
9" squares : CUT 4 from various prints
Total: 5.5" 4 HST
Total: 5.875" : 4 HST ---> seam ripper out these HST to make 8 QST

Corner Setting Triangles
8" squares: CUT 2 from solid fabric ---> cut those into 4 triangles

Hello, are you there? Oh wow, I almost blanked out typing all those up...... boring! Let's do the same sorta thing but with pictures and diagrams. So much better!


First up cut out squares for HST.

Next, match up squares...

Then sew around each set of squares to create 4 HST.


Next comes the three different kinds of blocks: Center 4 blocks - Side Triangles - Top/Btm Triangles

First the easy ones: Center 4 Blocks from 8 1/2" squares ---> 4 HST Trimmed to 5 1/2"


Then the tricky Side/Btm/Top Setting Triangles - for all triangles
From the 9" squares ---> 4 HST ---> cut 2 - 5 1/2" HST and 2 - 5 7/8" HST


For side setting triangles - Cut trimmed 5 7/8" HST into 2 QST


Side Setting Triangle Unit lined up like this - 


Top/Bottom Triangle Units  - Top and Bottom units use 1 - 5 1/2" HST and 2 - 5 7/8" deconstructed HST. Once HST are trimmed use your seam ripper to deconstruct the 5 7/8" HST and use them to sew up the top and bottom triangle units.


Okay there are all the units you'll need to sew up this quilt! Pretty straight forward right? If you have any questions please leave them in the comments and I will answer them there so we can all see what's happening.

Also share these with us! Tag them #bluebirdsewsQAL on IG or add them to the Flickr page.

I can't wait to see what you all are sewing! Next week I'll talk about how to sew the units together into rows and the a quilt top. That part is super easy! We're almost done with this quilt top! Hooray!

Cheers,

Kelly

ps. the first post from this series can be found here: Fabric Choice

QAL with Blue Bird Sews


Quilt with Me: Fabric Choices


Hello Lovelies! Welcome to Week 1 of our Quilt Along! This is the time to choose fabrics and get a plan going for this half square triangle quilt. Hopefully I will come up with a better name than that by the end of the QAL - any suggestions?!

I'm not one for much chit-chat; so let's talk fabric. When I started this quilt I had only 1 request and that was for color - purple and grey to match the soon to be here baby girl room. So I hit up my fabric stash and came out with a stack of all I had in purple and grey - it really wasn't much. Which is a good thing! Limits foster creativity. Without the perfect fabrics I had to get creative and use what I had.

Now I had a stack of fabric in purple and grey but what I look for when auditioning fabrics for a quilt is: Value, Scale and Prints. Three super important factors for getting just the right mix of prints, solids and colors. But before you dig through your stash of fabrics or drive to the fabric store let's talk.


Let's start with value. A really great tool for choosing the right value is to take a picture and change it to black a white. I did that for the next examples and I hope it helps to illustrate the point.

You might notice on the first quilt that there are prints that don't really read purple but the value is there in one way or another. Like the white background and little purple violets. It's not super purpley but it reads as a light value something that you will need to balance out the dark and medium values of the other fabrics.


Notice in the picture above that the fabrics you might have thought were dark - like the grey is actually medium - and the prints you thought were medium are actually dark - like the purple geometric. Know the value of the fabrics will help you match them up with each other and create the most contrast for the HST blocks.

Next there is scale; a good quilt has a place to rest the eyes and a place to move the eye around. So when choosing prints make sure to get a good ratio of tiny prints to keep the eye moving and larger scale prints to give the design a little rest. There is no magic number for how many large scale vs. small scale prints to include - that is up to the designer but let me say 80/20 would not be so great.

Okay, so now go over to your stash and pick a big ol' stack of fabrics in your choice of color. Red, blue, purple, yellow, green. What ever color you like pick out prints and solids, choose different values, choose your best and least favorites. Then let's mix in a neutral. In this case the choice was made for me; grey with purple. But you could do; red and grey, blue and grey, green and black, pink and brown, red and brown, blue and tan, yellow and grey, red and black, red and brown, blue and grey, green and black....you get it right? Pick a color and then add a complimentary neutral to it. Now go back to that fabric stash and pull out all prints and solids in your color and neutral choice.

Here's where the colors in the prints come into play. Make sure your prints do not have lots of other colors in them. You want your fabrics to be purple, not purple with lots of yellow - or purple background with big yellow and blue flowers. Make sure your fabrics have just one color in them or a small bit of other colors that keep with either the warm or cool sides of the color wheel depending on the color you have chosen. For example if you color is blue and you have a print with a little bit of green in it then I'd say go for it, but if you have a blue with a little bit of orange then I'd pass. Stick with your color wheel friends.

Let me stress here that the print isn't as important as the value at this point. Especially for scrappy quilts. The blue hue quilt I made has some of my least favorite fabrics from my stash but it works so well because they are all in the same hue - the value is what gives the interest not the individual prints.


One last addition to your fabric pull is a shade of white. For the quilt above I choose a cream color to break things up a bit. You might want a brighter white or even a beige - that will depend on your color choice and the values in your fabrics. Try a couple out and see what meshes best with your color choice.

Now take all the chosen fabrics and mash that pile together and take a picture of it. Now take that picture and change it to black and white. Got it, okay. That's the picture you want to study for choosing your final set to fabrics to use. Get a good mix of dark, light and medium values.

Here it doesn't matter what colors they are, value is what is important, but you also want a good mix of color to neutral like around 50/50. For the overall values I would say 30/30/40 ratio of dark/light/medium so that when putting together blocks you have enough mix to get a good contrast to each block. Here's a picture of my final fabric stack. Looks a lot like the first but I had to edit a bit because I used up a bunch in the last quilt!


Whew! Okay what have you got?  A huge wonderful stack of awesomeness - that's what! So here's the part I am not so great at but I'm going to give it a go just for you!

Yardage Required:
Backing: 1 3/4 yard
Binding: 1/2 yard
Light value: 1 yard
Dark value: 1 yard
Medium value: 1 1/4 yard

Now the fabric for the quilt top is an over estimate and because we are working from the stash you probably pulled out way more fabric than this even, that's cool. We'll just cut what we need and re-stash the rest. If you are buying fabric for the quilt then stick with fat quarters or 1/2 yard cuts. For my fabric choices I have about 15 different fabric choices. But I like a scrappy quilt! Chose how ever many you are comfortable with!

Okay now you've got a pretty stack of fabric to pet and talk nice to until we cut it up into squares, okay.

Let me know if you've got any questions. I will respond in the comments below so everyone can benefit from the discussion. And let us know if you have any tips or tricks for picking out your fabrics!

Next time we will talk about cutting and sewing Half Square Triangles and little bit about on-point settings! If you are following along grab a button below!

Cheers!
Kelly


QAL with Blue Bird Sews


Finished Quilt: Cowboy Wild Goose Chase

Instead of an explanation in words how I made this quilt I thought it would be better to share the process in photographs. So be warned, lots of yummy quilt pictures. Enjoy! 


I made that! :)
Cheers,

ps. I'm going to  be hosting a Quilt Along soon, for this quilt. I'm writing and working on it now, want to join? hee.hee!

Mama's got a brand new bag...

I have had this bag on the brain for about year. It was percolating in there but I didn't know how to start, where to begin with the design. Having only made a handful of bags my construction technique wasn't up to the challenge..not yet. But then that changed and I made the bag of my dreams!


So how did I overcome my bag making shortcomings? I made a practice bag and I searched for a bunch of tutorials and inspiration. I made this bag first and I used Elizabeth Hartman's Quilt-as-you-go tutorial for bags (but I didn't use the canvas inside, I wanted a floppy bag) I looked at this picture from Fresh Lemons about a hundred times and then I just dove in. 


The fabrics came from my stash and there is a mix of vintage and new, just like always. I love, love this color palette; look for more of this combination coming soon! There is a little bit of Anna Maria Horner, lots of DS quilt and my favorite vintage prints that I have been hoarding for special projects. 


The inside has a canvas bottom and some of my favorite linen blend vintage lining. I put in a little pocket up top and zigzag stitched around the top. I used a pretty clever technique to make the bag handles and I may get around to sharing that here.

This is project number 2 of the new year and it's like in the top 5 favorite all time makes already. It just says ME all over it. The fabrics, the way it's put together, the fact that I didn't use a pattern but was able to construct it by myself - it all just adds up to a big 'ol YES!

What's been your favorite thing you've ever made and why?


Cheers!
Kelly

Winter's Steely Grey and Purple Quilt

Hi. It's really Christmastime now. Just a few days left until the family gathers and friends come to call. This is what all the preparation is for. But before I get back to the sewing of little person PJ's and snack bags I wanted to pop in a share a quilt finish from last month.


Remember my little boy blue quilt post? I had eluded to the two pregnant ladies in my life - one a baby boy (who is healthy and happy!) and a little girl (who is expected in February) - Baby Winter. It was baby Winter's turn and mom choose a very pretty palette of grey and purple. So I hit the stash and came back with several shades and a few creams for good measure.


Now with most of my quilt designs I wasn't exactly sure where this quilt was headed. I had a half square triangle quilt for inspiration so I started there and used The Sometimes Crafter tutorial for making HST (it's brilliant and quick).


Then I waited and during that time my circle of Do. good stitches was working on an HST quilt top inspired by this quilt top. It was just the right hues to work with the fabrics I had pulled.


So in the end it turned out beautifully. It is backed in flannel and straight-line quilted on either side of each triangle.


I am thinking of writing up a simple tutorial for this because it really is so easy to make. Would anyone be interested in that????

Cheers and Merry Christmas to you and yours!
Kelly

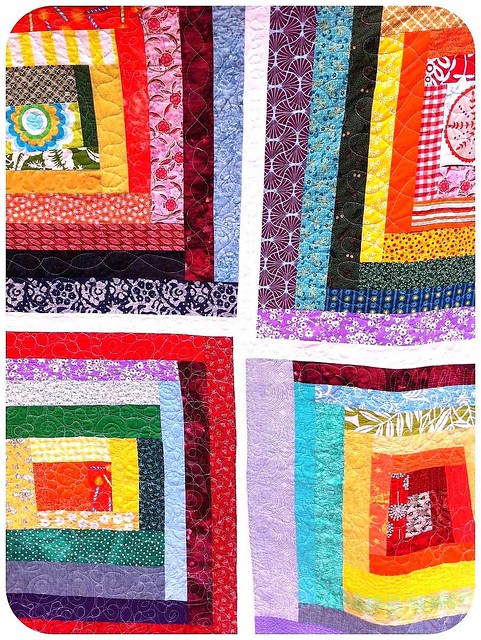
Rainbow Scrappy: Log Cabin Quilt

Remember once upon a time when I was making rainbow inspired goodness? Well that never really stopped, I have been trucking on this quilt for just a year and a half. I made the first block on a rainbow whim and that was going to be it. A big pillow I thought. I made another for the back but I couldn't stop making them.


I made a 6 block top and showed it to the hubby. He said quilts need to be big - and I agreed. I hate that when the toes stick out or the arms aren't quite covered. So I made 3 more blocks and fudged it together with the first 6. It measures 76" x 82". All the blocks are total improv. No measuring with anything other than my eye. So making them all fit together with a little white around the edges to break up the colors was a little tricky. But I made it happen. One strip, one color and one scrap at a time.

Rainbow Log Cabin Scrappy Quilt

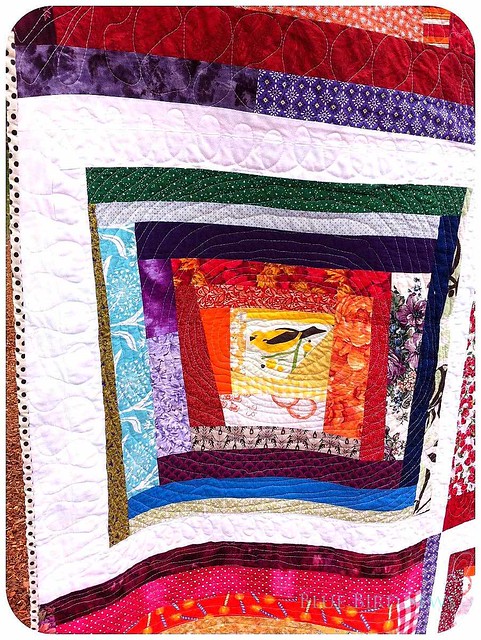
The scraps really do tell the story of  my quilting life. There are not so pretty fabrics in there; ones that were gifted to me or that I had long before Blue Bird Sews. There is a huge amount of swapped scraps most notably from Spontaneous Threads when I won a box of scraps from her a while back. Then there was an amazing grab bag of modern scraps from one of my favorite thrift stores. There was also Stashtacular from 2 summers ago where I was the beneficiary of some wonderful and tragic prints.

Rainbow Log Cabin Scrappy Quilt

The other notable aspect of this quilt is the quilting. I knew I wanted to practice hard core on it but I didn't know what patterns or ideas exactly. So I just sat down and first made little loops on the white boarders. They looked adorable so I did the DS Quilts loop d' loop on one of the blocks. Then I wanted to practice some swirls so I did that but wasn't satisfied with the density so I went back and filled in with circles. I did two of the blocks with different boarders. I did more swirls and I did repeating lines.

Rainbow Log Cabin Scrappy Quilt

I did it all and I learned a bunch about how my machine jumps when I let go of the quilt. About how I can't move my left hand without losing total control over the design. And about my stitch regularity and how it needs a lot of work. And that is just what this quilt was for. Testing, growing and learning.

Rainbow Log Cabin Scrappy Quilt

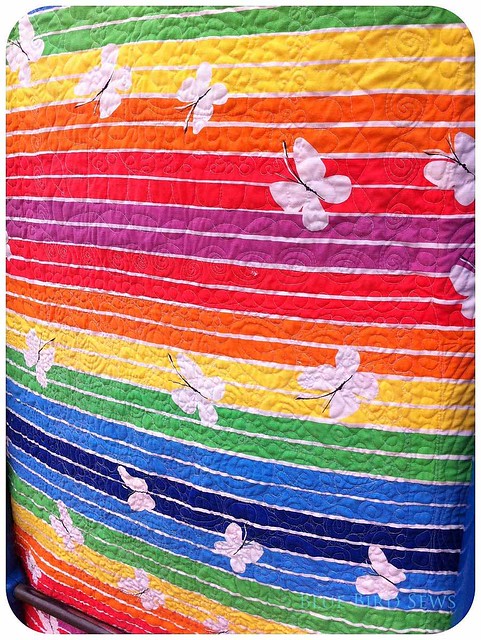
The last little bits that are incredible about this quilt is the backing and binding. Backing in rainbow vintage sheet and binding in vintage black on white polka dots. Perfect.

Rainbow Log Cabin Scrappy Quilt

Have a wonderful weekend! I will be doing a holiday market at the Portland Waldorf School on Saturday in Milwaukie. I am hoping there are lots of people who need a quilt (but not this one)!

Cheers!
Kelly